First day of school: is there a sweeter concept than that? Especially after a long, hot summer. And an even longer Labor Day weekend.
I’ve accepted that I’m in a phase in my life where weekends just aren’t the leisure and loveliness they used to be. For example, 3-day weekends that alternate between so hot you can’t even go outside to freezing and raining, and involve a very busy 1-year-old, and a 3-year-old who still hasn’t quite gotten the hang of pooping in the toilet, really aren’t very fun.
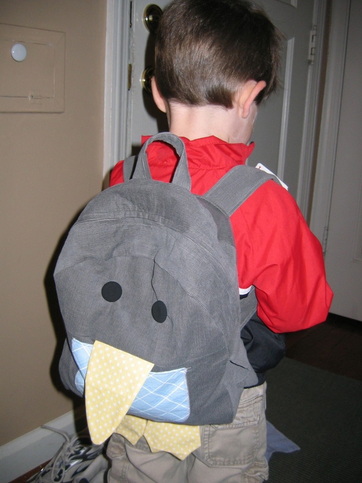
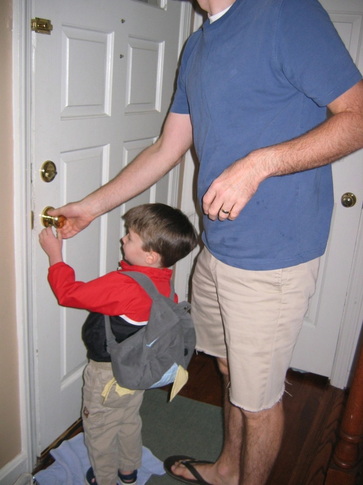
So I was thrilled to go to bed last night, and know that today, we could start over! It did feel like a fresh start this morning, as Max headed off to preschool with daddy, with his backpack strapped on his back like he knew exactly what he was doing.
I’ve accepted that I’m in a phase in my life where weekends just aren’t the leisure and loveliness they used to be. For example, 3-day weekends that alternate between so hot you can’t even go outside to freezing and raining, and involve a very busy 1-year-old, and a 3-year-old who still hasn’t quite gotten the hang of pooping in the toilet, really aren’t very fun.
So I was thrilled to go to bed last night, and know that today, we could start over! It did feel like a fresh start this morning, as Max headed off to preschool with daddy, with his backpack strapped on his back like he knew exactly what he was doing.
Was I thinking: “ooh, my sweet little boy! I will miss him so much! How has he gotten so big, so fast?”
Um . . . no. I was thinking: “I am so glad I get to head upstairs and get back to work. And damn, that’s a good-looking backpack!”
It’s a pattern from Oliver + S Little Things to Sew. I am digging this book sooo much, and I’ve already got about 6 other projects dog-eared. Max zeroed in on this backpack immediately. There was no “hmm, well, maybe, but can you make it out of Scooby-Doo fabric?” It was: “I want THAT backpack, mommy!”
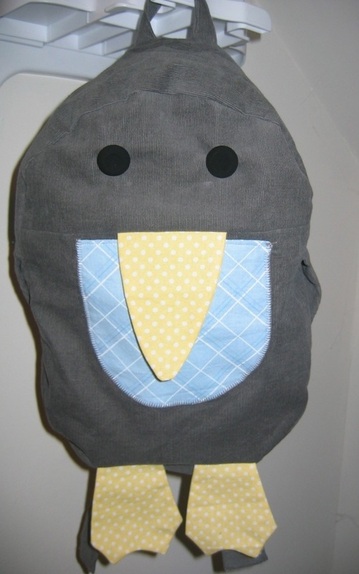
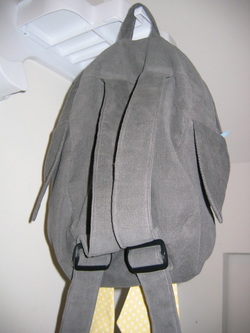
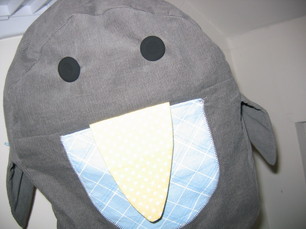
I pretty much matched the colors of the pattern: I picked out a grey corduroy for the body, a blue with a subtle diagonal plaid for the front pocket, and a yellow with a small white dot for the beak and feet. I lined the whole thing with basic light blue cotton broadcloth. I had a hard time finding the right-size strap adjusters at Jo-Ann’s, so I ordered some from Hardware Elf (they came within just a few days).
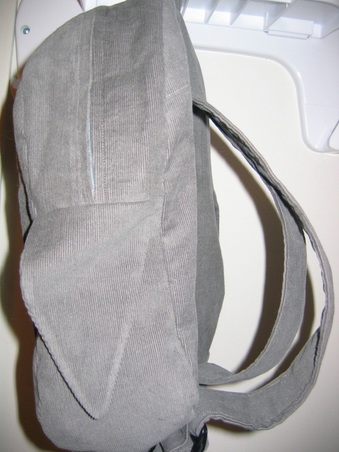
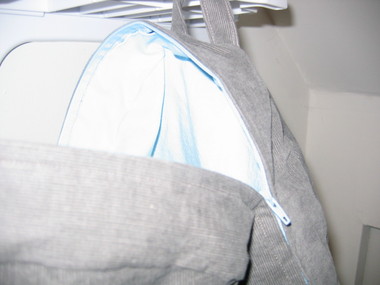
Overall, it’s really a fantastic pattern. There are a LOT of pieces (more than a dozen). As I was tracing the pieces and cutting them out, I began to wonder if I was in for something way more complicated than I anticipated. But it’s actually a very simple pattern, with very, very clear and smart directions. In fact, I learned a new way to make an outside pocket even cleaner at the top. The whole backpack is constructed beautifully—lined and reinforced in the right places. The directions for the zipper are good, although I sort of followed my own method (but don’t be intimidated if you’ve never done a big zipper—it’s super easy, I promise).
I wish it were just slightly bigger (the preschool instructed us to make sure the kids’ backpacks were big enough for their “homework” folder—and this one is, but just barely).
Overall, I can’t recommend this pattern enough for a kid's backpack, whether you want to do the penguin, or leave off the beak and feet and pick out a snazzy fabric.
And now, I’m going to enjoy the remaining hours of peace before I hear little feet scampering back inside . . .
Overall, I can’t recommend this pattern enough for a kid's backpack, whether you want to do the penguin, or leave off the beak and feet and pick out a snazzy fabric.
And now, I’m going to enjoy the remaining hours of peace before I hear little feet scampering back inside . . .


 RSS Feed